The WHMCS provisioning module connects one service to one DCIM server. Lifecycle commands update DCIM, while the companion addon provides persistent client and administrator pages for power, provisioning, remote console and recent activity.
One WHMCS server definition can be reused across several products. Configure the datacenter on each product so separate products expose different server pools without duplicating API credentials.
View the WHMCS integration overviewRequirements
- WHMCS 9.0 or newer running PHP 8.2 or PHP 8.3.
- PHP cURL and JSON extensions enabled.
- A reachable DCIM API base URL ending in /v1.
- A dedicated DCIM API token with the ADMIN audience.
- A public HTTPS/WSS URL for every agent used by customer remote console sessions.
API token scopes
Create a dedicated token in the DCIM dashboard with the ADMIN audience and these scopes:
SERVER_READSERVER_POWERSERVER_PROVISIONSERVER_REMOTE_CONSOLEPART_READSWITCH_PORT_MANAGEJOB_READLOG_READRestrict the token
Restrict the token to the WHMCS server's public IP whenever possible. Do not reuse a dashboard or agent token.
Install the module
- 01Obtain dcim.tar.gz from the DCIM distribution package.
- 02Copy the archive to the WHMCS server.
- 03Extract it into the WHMCS application root.
- 04Confirm that both the dcim server module and dcimmanage addon are present.
- 05Activate DCIM Management under System Settings > Addon Modules.
- 06Grant addon access to the required administrator roles.
Extract the WHMCS module
tar -xzf dcim.tar.gz -C /path/to/whmcsExpected module paths
The archive contains the complete WHMCS-relative directory structure.
modules/servers/dcim/dcim.phpmodules/addons/dcimmanage/dcimmanage.phpUpgrading the module
Extract a newer archive over the same WHMCS root. Existing server connections, product options and service assignments are stored by WHMCS and remain in place.
Create the server connection
- 01Open System Settings > Servers and add a new server.
- 02Choose DCIM as the server module and enter a descriptive hostname.
- 03Paste the dedicated ADMIN token into Password.
- 04Set Access Hash to the complete HTTPS DCIM API URL, including /v1.
- 05Enable Secure, set port 443 and run Test Connection.
Connect a product
- 01Open the product and select DCIM under Module Settings.
- 02Choose the reusable DCIM server connection created earlier.
- 03Choose the datacenter for this product. Only STOCK servers from it are selectable.
- 04Switch the module settings to Advanced Mode.
- 05Explicitly select the required Create, Suspend, Unsuspend and Terminate actions, then save the product.
Assign a service
- 01Open the WHMCS service after assigning the DCIM product.
- 02Use the searchable DCIM Server field to select a STOCK server.
- 03Set the standard WHMCS Dedicated IP when IP assignment is enabled.
- 04Run Create and confirm that the service tag and configured lifecycle changes are applied.
Product lifecycle options
Create
- Add service tag: adds WHMCS-service_id to the selected server.
- Assign Dedicated IP: assigns the standard WHMCS Dedicated IP and marks it primary in DCIM.
- Set status ACTIVE: changes the DCIM lifecycle status after assignment.
Suspend and Unsuspend
- Disable switch port: disables the primary connected switch port.
- Power off server: submits a DCIM power-off job.
- Unsuspend provides the matching enable-port and power-on actions.
Terminate or Cancel
- Enable switch port: restores the natural enabled state before reuse.
- Power off server: leaves the hardware off for the next provisioning.
- Unassign all IPs: removes every DCIM IP assignment from the server.
- Remove service tag: removes only the matching WHMCS service tag.
- Return to STOCK: restores the inventory hostname and STOCK status.
Save Advanced Mode explicitly
WHMCS does not persist unchecked advanced options merely because the module declares a default. Select every lifecycle action you require and save the product.
Natural termination state
The recommended termination flow enables the switch port first, powers the server off, removes IPs and the service tag, restores STOCK, then clears DCIM Server ID. The next operator receives reachable networking when the server is powered on for provisioning.
Lifecycle behaviour
| WHMCS action | DCIM behaviour |
|---|---|
| Create | Requires a STOCK server, assigns the WHMCS Dedicated IP when enabled, adds WHMCS-{service_id} and can set ACTIVE. |
| Suspend | Disables the primary switch port and can request server power-off. |
| Unsuspend | Enables the primary switch port and can request server power-on. |
| Terminate | Enables the port, powers off, unassigns IPs, removes the service tag, returns the server to STOCK and clears DCIM Server ID. |
Power and switch operations are asynchronous. WHMCS records success after DCIM accepts the job. A Create retry is idempotent when the matching service tag already exists.
Service server assignment
Each service receives a searchable
DCIM Server field. It lists only STOCK servers from the product datacenter and stores the selected UUID in DCIM Server ID.IP assignment uses WHMCS's standard
Dedicated IPvalue. Populate that core service field before Create, or disable the product's Assign Dedicated IP option.Customer management
Active services expose a
Manage Server button. It opens a dedicated addon page that retains the WHMCS client navigation and provides device information, power actions, provisioning, job progress, remote console and recent logs. The back arrow returns to the native service page.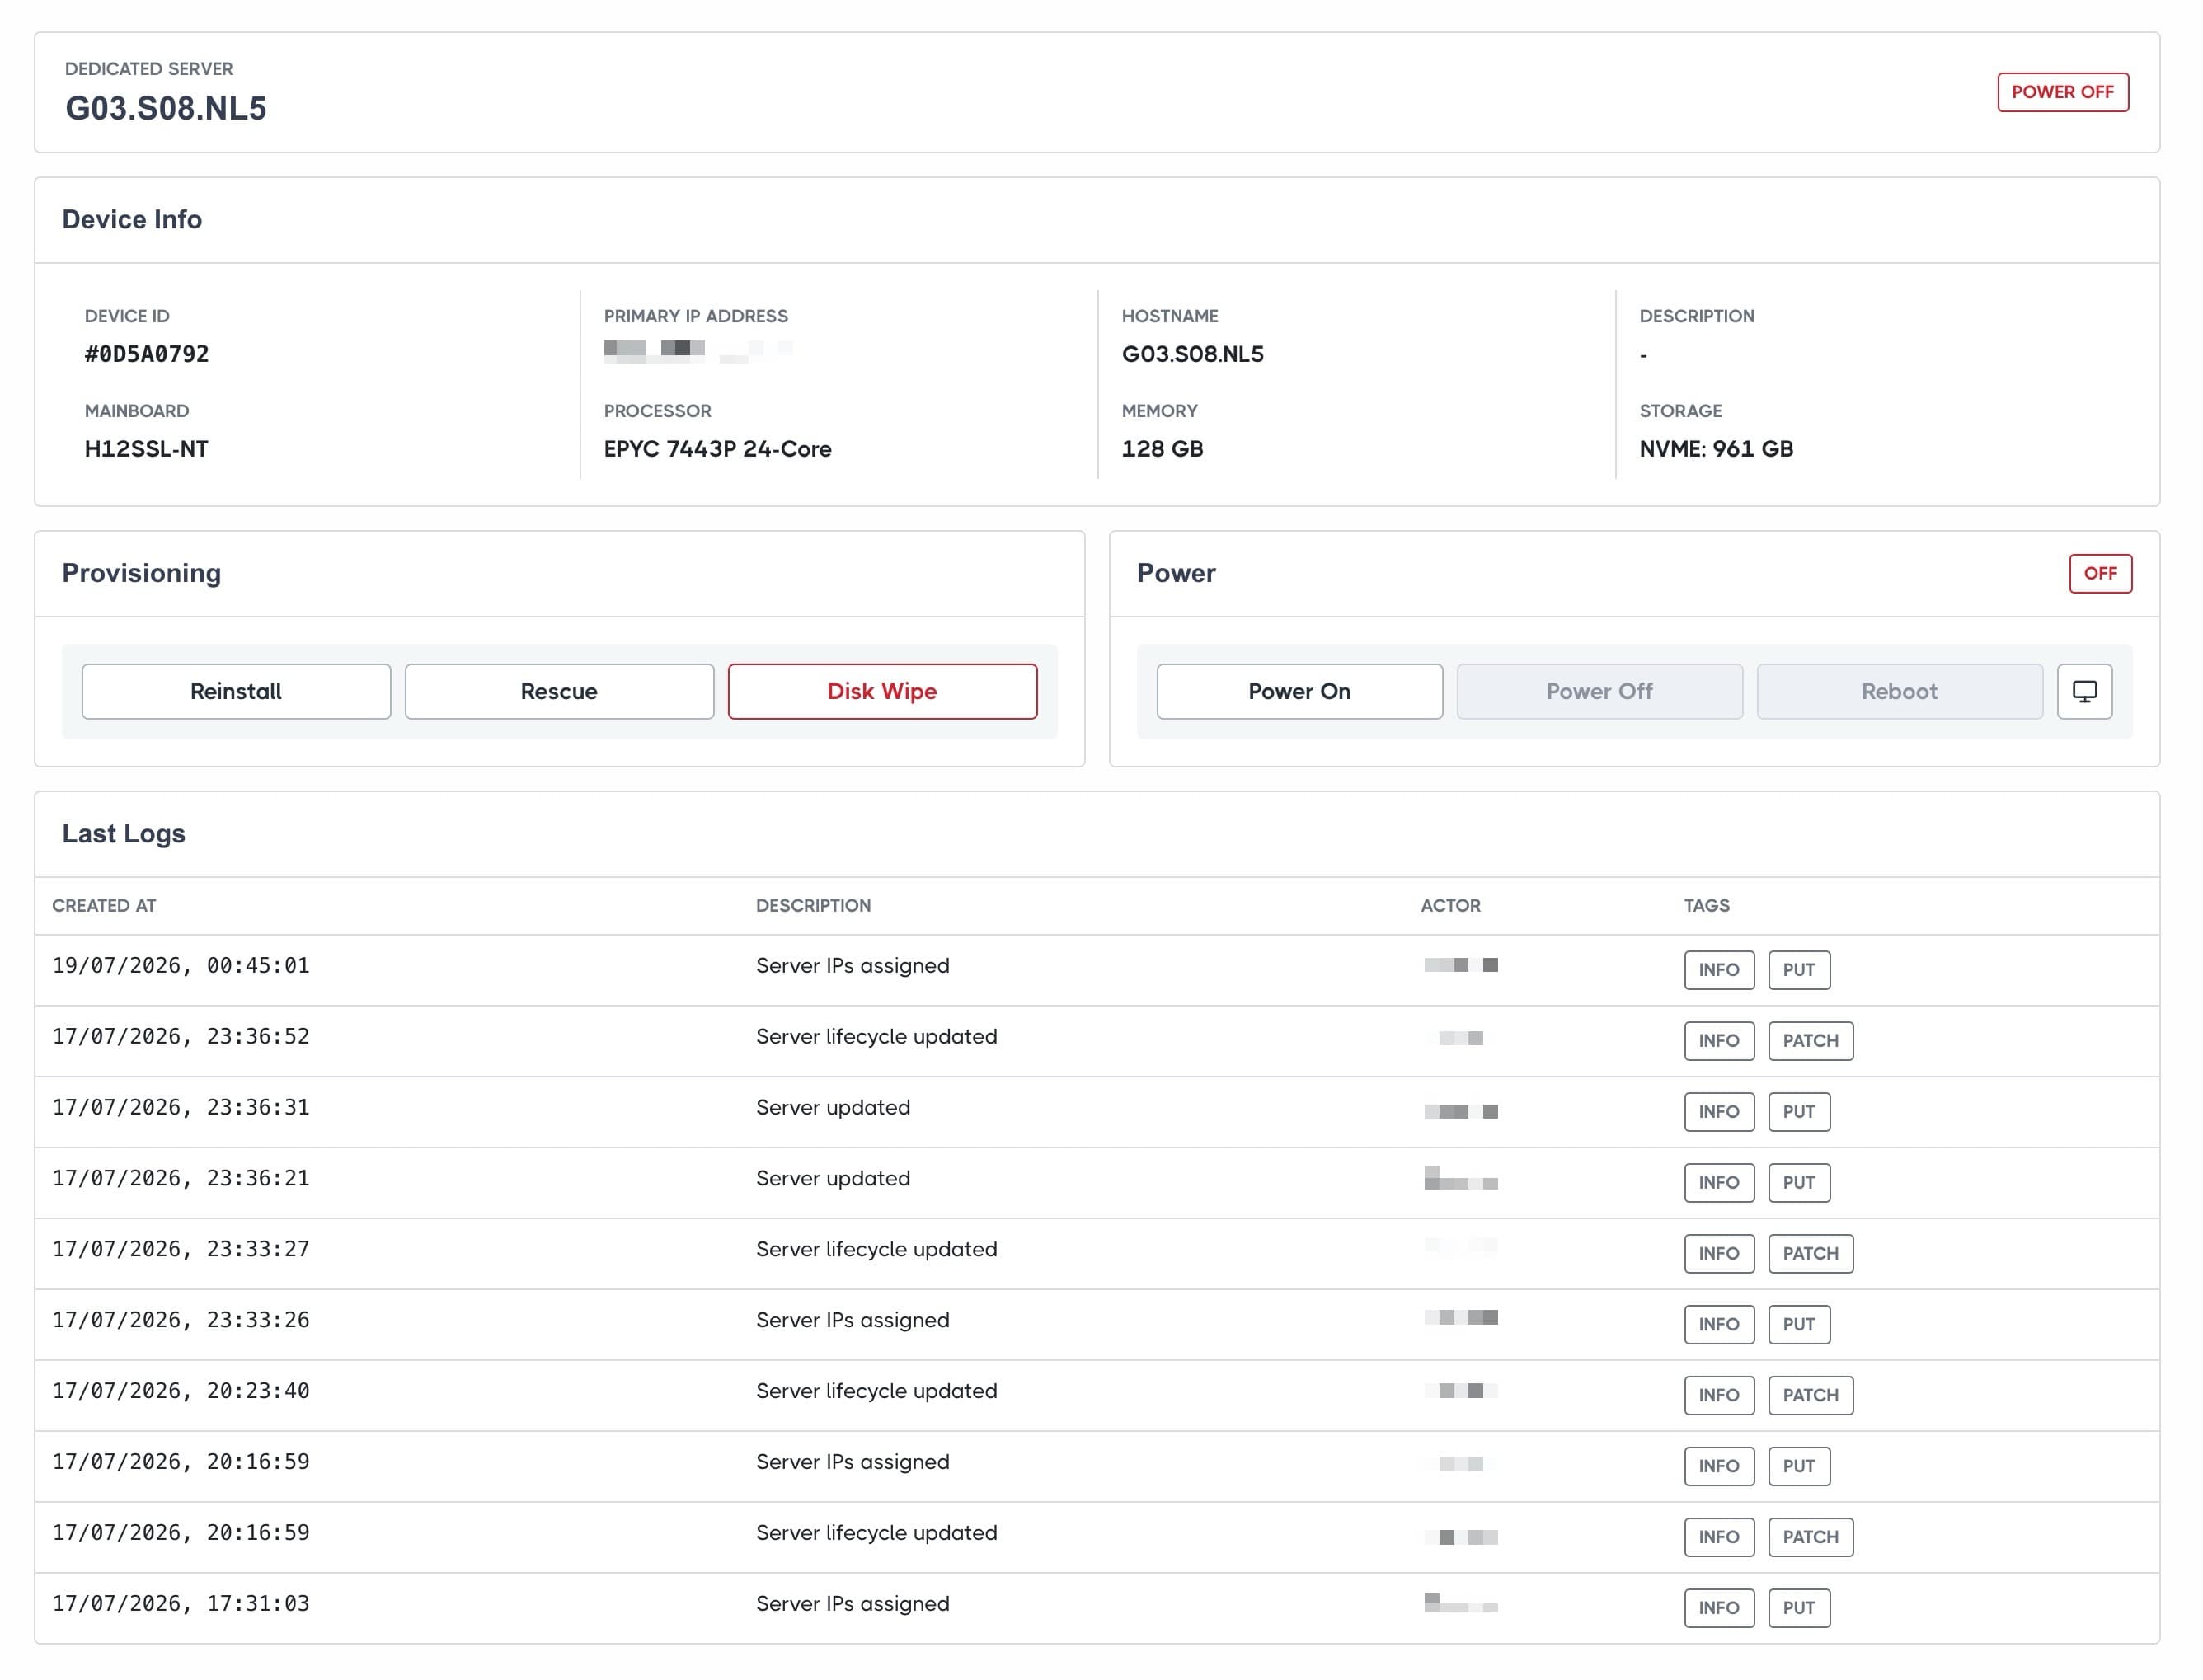
Client access boundary
Inventory status, switch-port controls and discovery remain admin-only. Suspended, terminated and cancelled services cannot call DCIM management actions.
Automatic disk selection
The Auto storage option sends an empty disk-part list so DCIM can choose the system disk. Explicit disk and RAID choices send the selected DCIM part UUIDs.
Administrator management
The native WHMCS command row remains limited to Create, Suspend, Unsuspend and Terminate. A separate
Manage Server link opens the full administrator DCIM page with discovery and primary switch-port controls. Its back arrow returns to the WHMCS service view.Remote console requirements
The customer browser connects directly to the DCIM agent. Its configured URL must use HTTPS, have a valid public certificate and be reachable by the customer. The WebSocket connection uses WSS.
No BMC credentials in WHMCS
WHMCS receives a short-lived viewer session. Customers do not receive the BMC username or password.
Verify the integration
- 01The WHMCS server Test Connection succeeds.
- 02The DCIM Management addon is active for the required administrator roles.
- 03The product shows a datacenter and lifecycle options.
- 04The service DCIM Server selector loads STOCK servers from that datacenter.
- 05Create assigns the selected server, service tag and Dedicated IP as configured.
- 06Manage Server opens the DCIM page for both clients and administrators.
Troubleshooting
Test Connection fails
Confirm the URL ends in
/v1, the token uses the ADMIN audience and every required scope is present. Also confirm that the WHMCS server can reach the DCIM HTTPS endpoint.The DCIM Server list is empty
Select a datacenter on the product and confirm that it contains servers with STOCK status. Servers assigned to another billing service are rejected.
Create reports that Dedicated IP is missing
Populate the standard WHMCS Dedicated IP before running Create, or disable the product's Assign Dedicated IP option.
Manage Server does not open
Confirm that DCIM Management is active, the user can access the addon and the service is Active with a valid DCIM Server assignment.
Remote console does not connect
Verify the agent is online, its URL uses HTTPS, the certificate is valid and the customer network can open the agent WSS endpoint.